Introduction
Tiled amplicon RT-PCR followed by sequencing with Illumina or Oxford Nanopore technology is the most popular method for generating SARS-CoV-2 whole genome sequences. Use of tiled amplicon sequencing allows samples with low viral genome copy number or degraded RNA to be assembled, but requires some modifications to standard NGS assembly protocols.
This article outlines a workflow for assembly of SARS-CoV-2 sequences from Illumina data, including quality trimming and removal of amplicon primers, map to reference, SNP calling and consensus generation. The workflow requires the BBDuk plugin, this can be installed by going to Tools Plugins.
This workflow has been tested on publicly available datasets from the NCBI SRA, projects PRJNA627229 (Walker et al, 2020) and PRJNA622817 (Paden et al, 2020), and gives identical results to the iVar pipeline (Grubaugh et al., 2019) and the CDC analysis pipeline for Illumina multiplex PCR.
1. Quality trimming and removal of amplicon primer sequences.
Prior to assembly it is important to remove poor quality bases and the PCR primers used to generate the tiled amplicons. If the primer binding site in the genome contains mismatches to the primer, variants in those regions may be missed if the primer sequences are not removed prior to assembly and variant calling.
The BBDuk plugin with some modified settings can be used to do both quality trimming and removal the amplicon primers in a single step. For paired end sequences which have not been merged, the amplicon primer is located at the 5’ end of each read. Prior to running BBDuk, the set of primer sequences used in sequencing must be imported into Geneious so these can be selected for adapter trimming. A guide to importing Artic network and other tiled amplicon sequencing primer sets from CSV or TSV files is at this link.
Once your primers have been imported into Geneious, open BBDuk by going to Annotate and Predict Trim with BBDuk. Under Adapters, select the folder containing the primer sequences, and set Trim to Left End. Adjust the Kmer Length and Maximum Substitution settings as shown in the screenshot below. To ensure only forward facing primers at the start of the read are trimmed, add the following custom commands under More Options:
rcomp=f restrictleft=32
To trim off low quality bases and filter out short reads, set Trim Low Quality to 20, and Discard Short Reads to 75 bp.
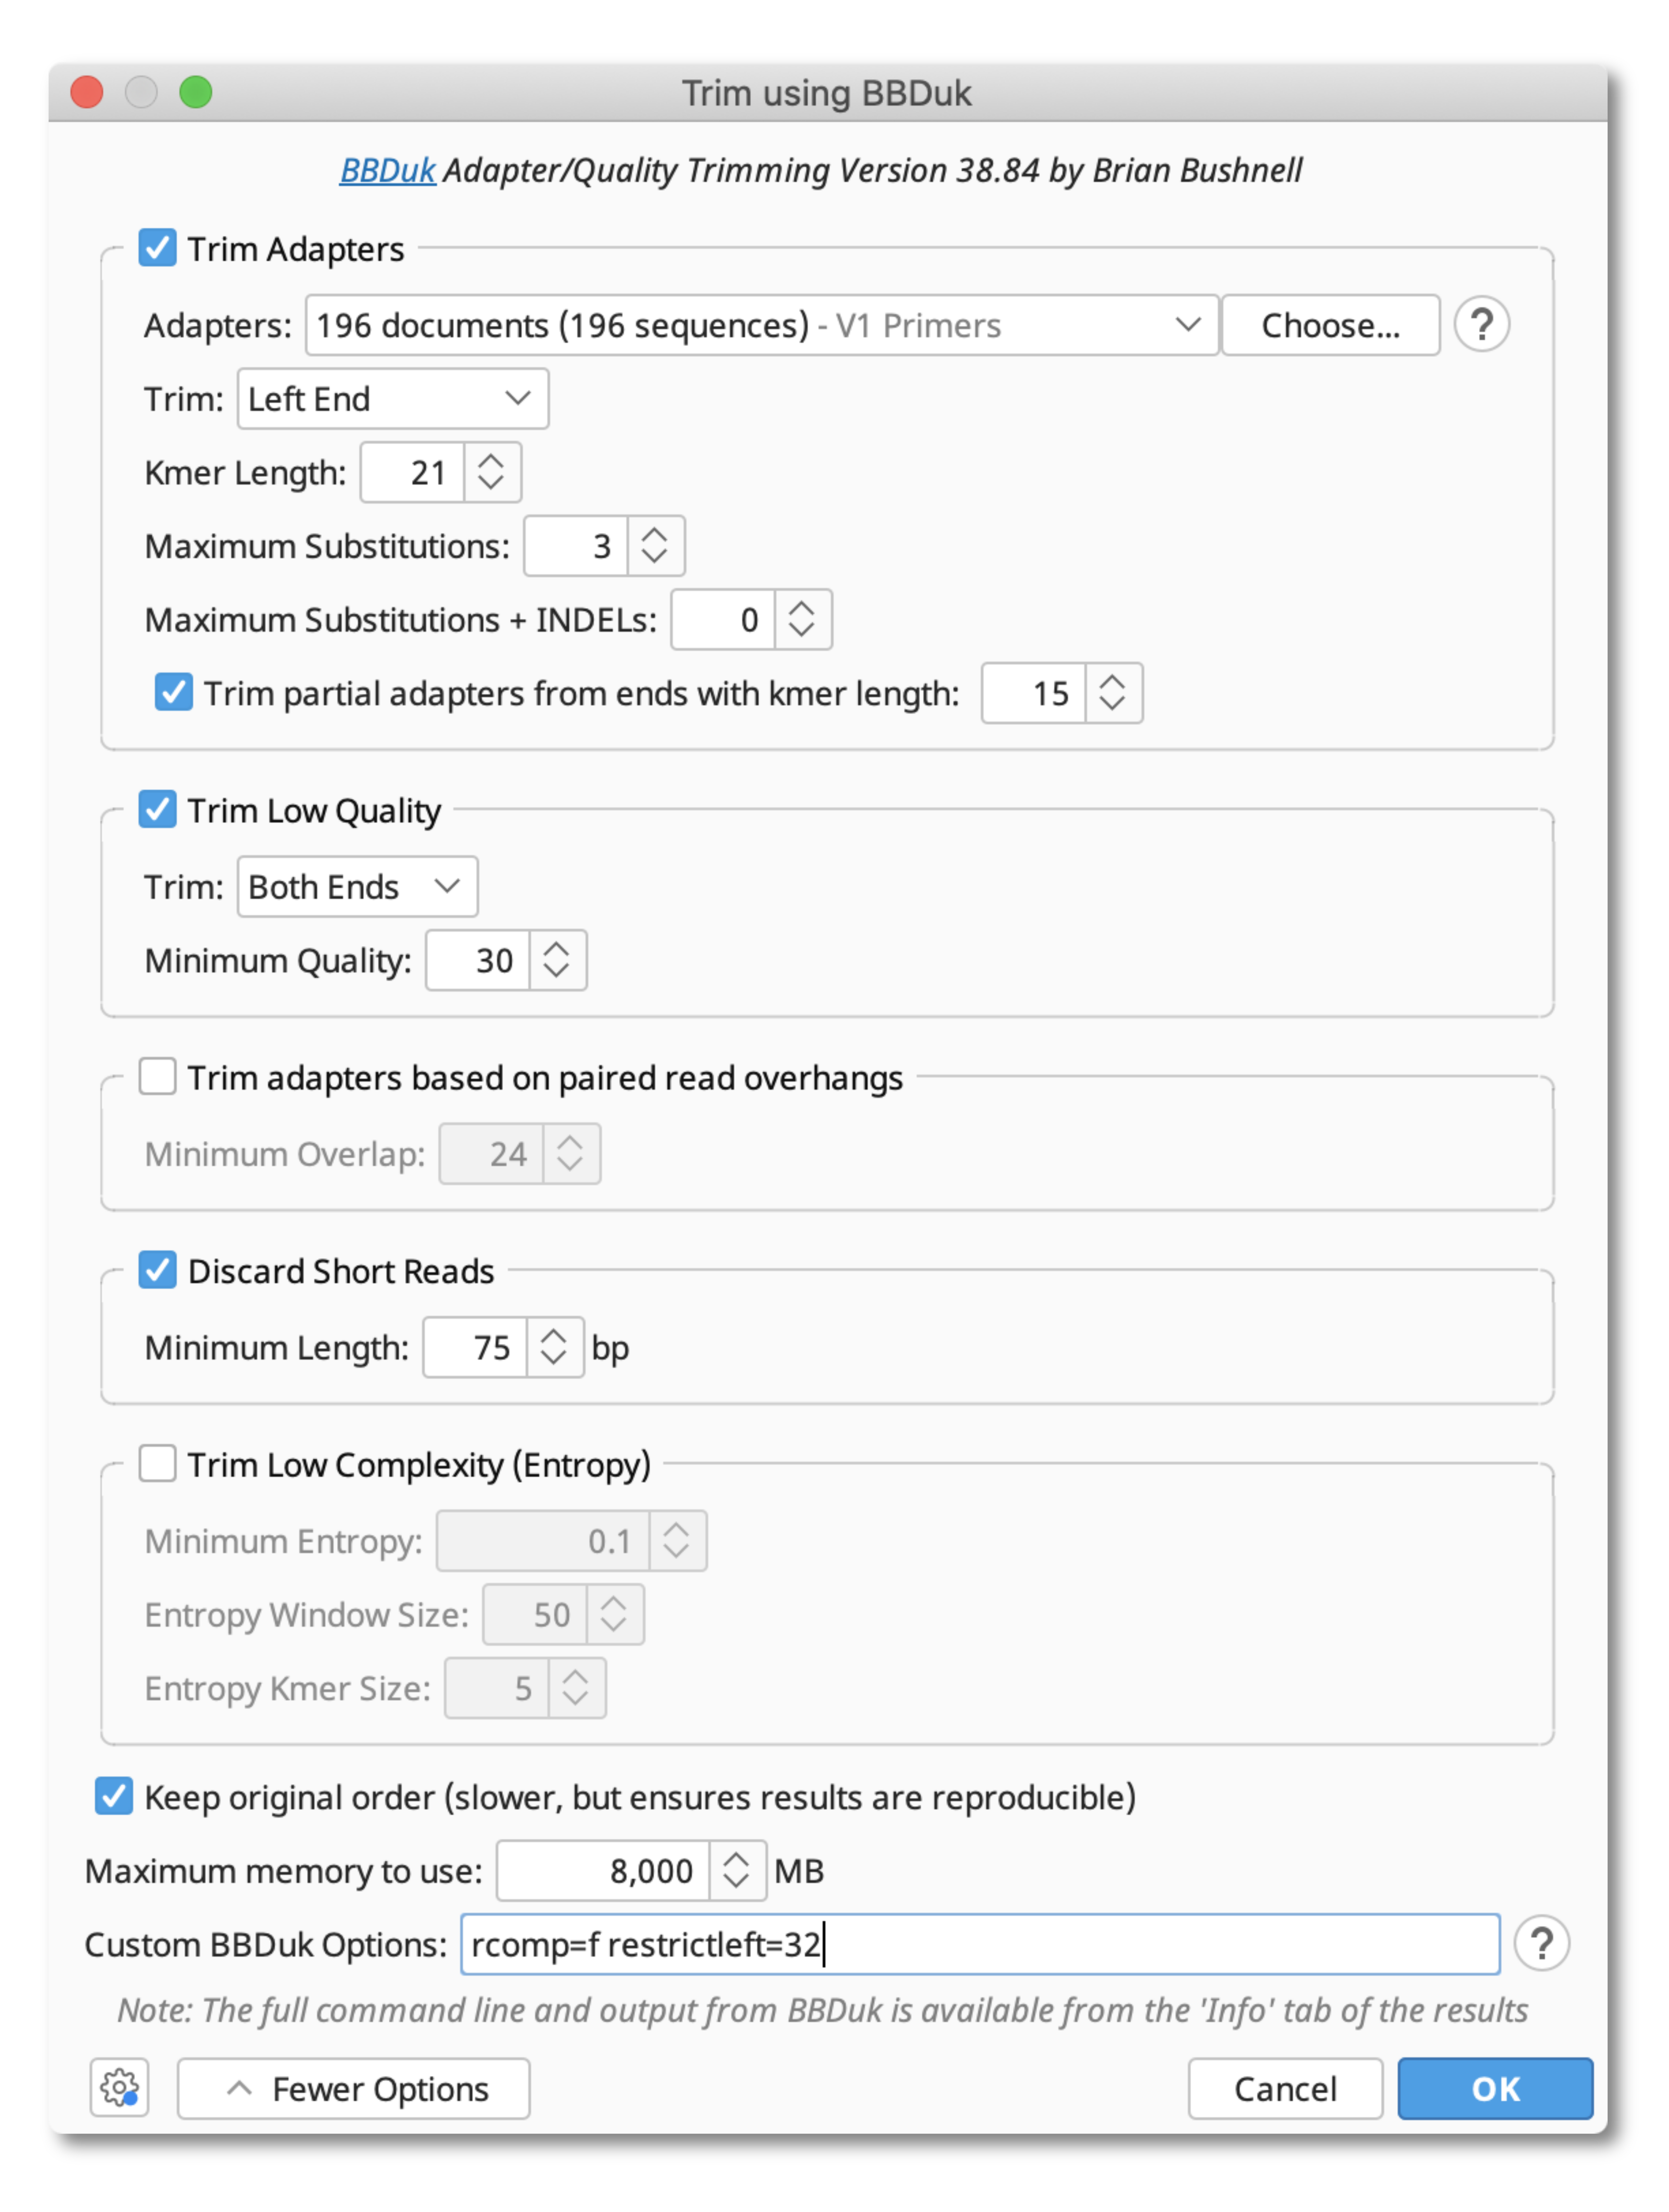
Note primer trimming may not be required for datasets generated using Ampliseq primer panels. As these datasets contain 2 overlapping pools of primers, the majority of the genome is sequenced twice with different primer pairs.
2. Map to Reference
The reference genome for SARS-CoV-2 can be obtained from NCBI, accession MN908947.
To map your trimmed reads to this sequence, select the file of trimmed reads and open Map to Reference under the Align/Assemble button. Set the reference sequence in the reference chooser, and set Sensitivity to Low, and Fine tuning iterations to 3. Then open the More Options tab, and change the sensitivity to Custom. Tick "only map reads which map nearby" and increase the "Allow gaps" setting to 50.
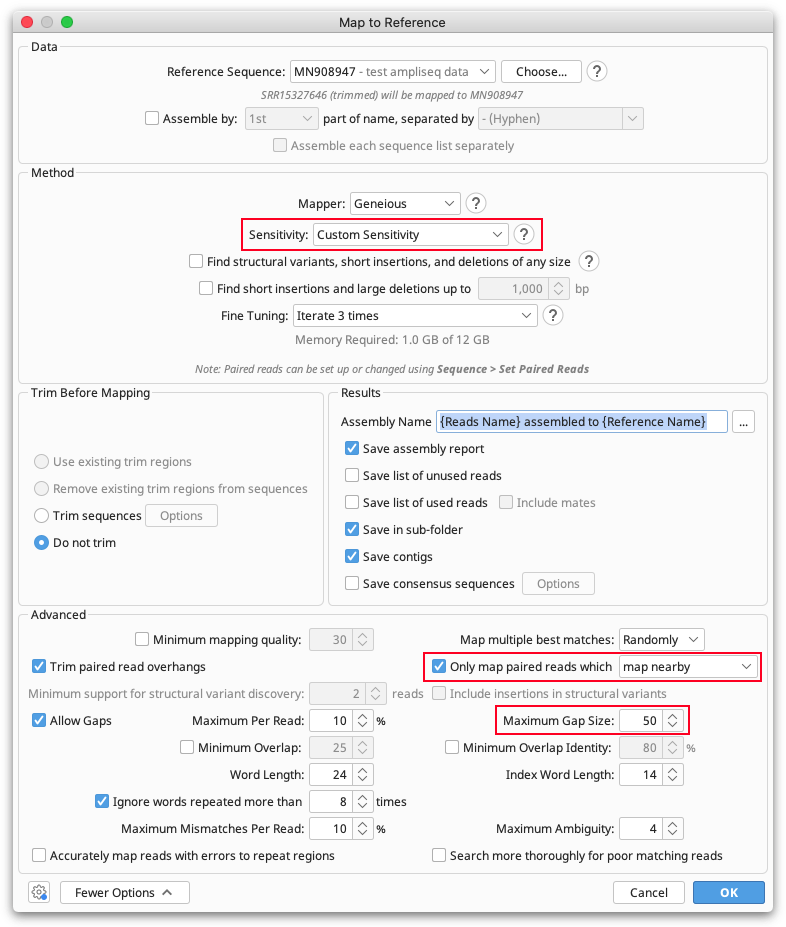
After the assembly is finished, it is important to inspect the contig file of mapped reads to identify whether any potential PCR chimeras are present as these can interfere with variant calling. These may be regions where the ends of reads do not appear to match the reference sequence or the sequence of other reads in that region, as shown below.
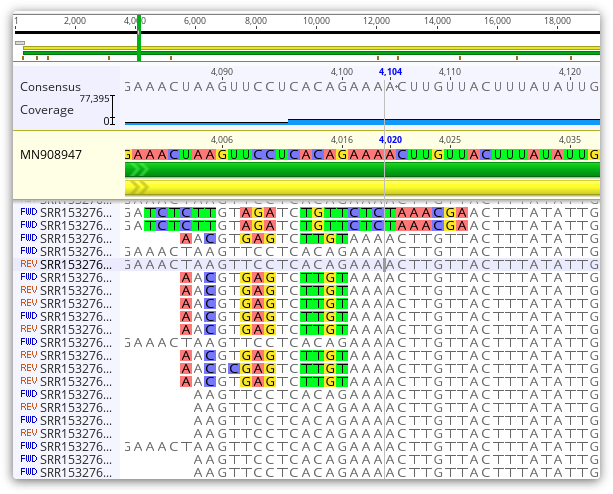
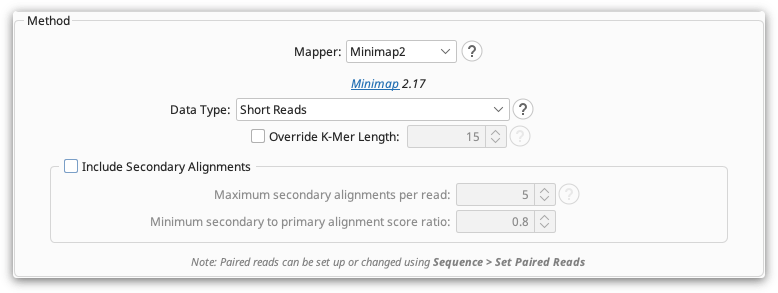
If chimeras are a problem in your dataset, we suggest using the Minimap2 plugin to map your reads instead of the Geneious Mapper, as Minimap2 will split the chimeric reads and map them correctly. After installing this plugin, choose Minimap2 as the Mapper in the Map to Reference options, set the data type to Short Reads and turn off secondary alignments.
3. Consensus sequence generation
The preferred method for consensus sequence generation is to call variants on the assembled reads and then apply those variant bases to the reference sequence, rather than generating a consensus directly from the assembly. This ensures that only statistically significant variants with good coverage depth are included in the consensus sequence.
To call variants, select the contig assembly document produced by Map to reference and go to Annotate and Predict > Find Variations/SNPs. Set Minimum Coverage to 10, and turn off Minimum Strand Bias P-value. If the strand bias setting is left on some variants may be missed, as the tiled amplicon approach can result in portions of the genome covered by only forward or reverse reads.
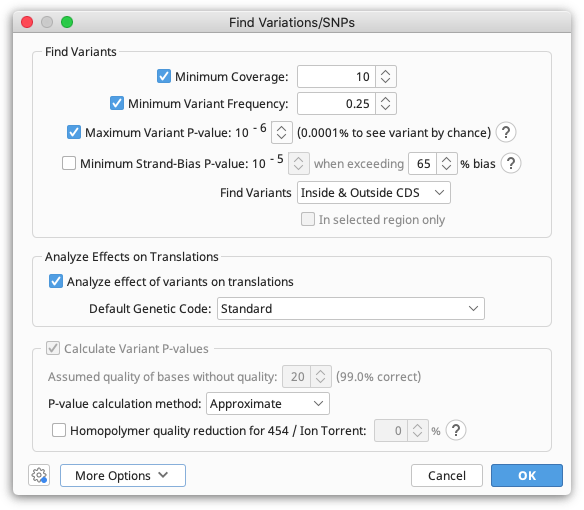
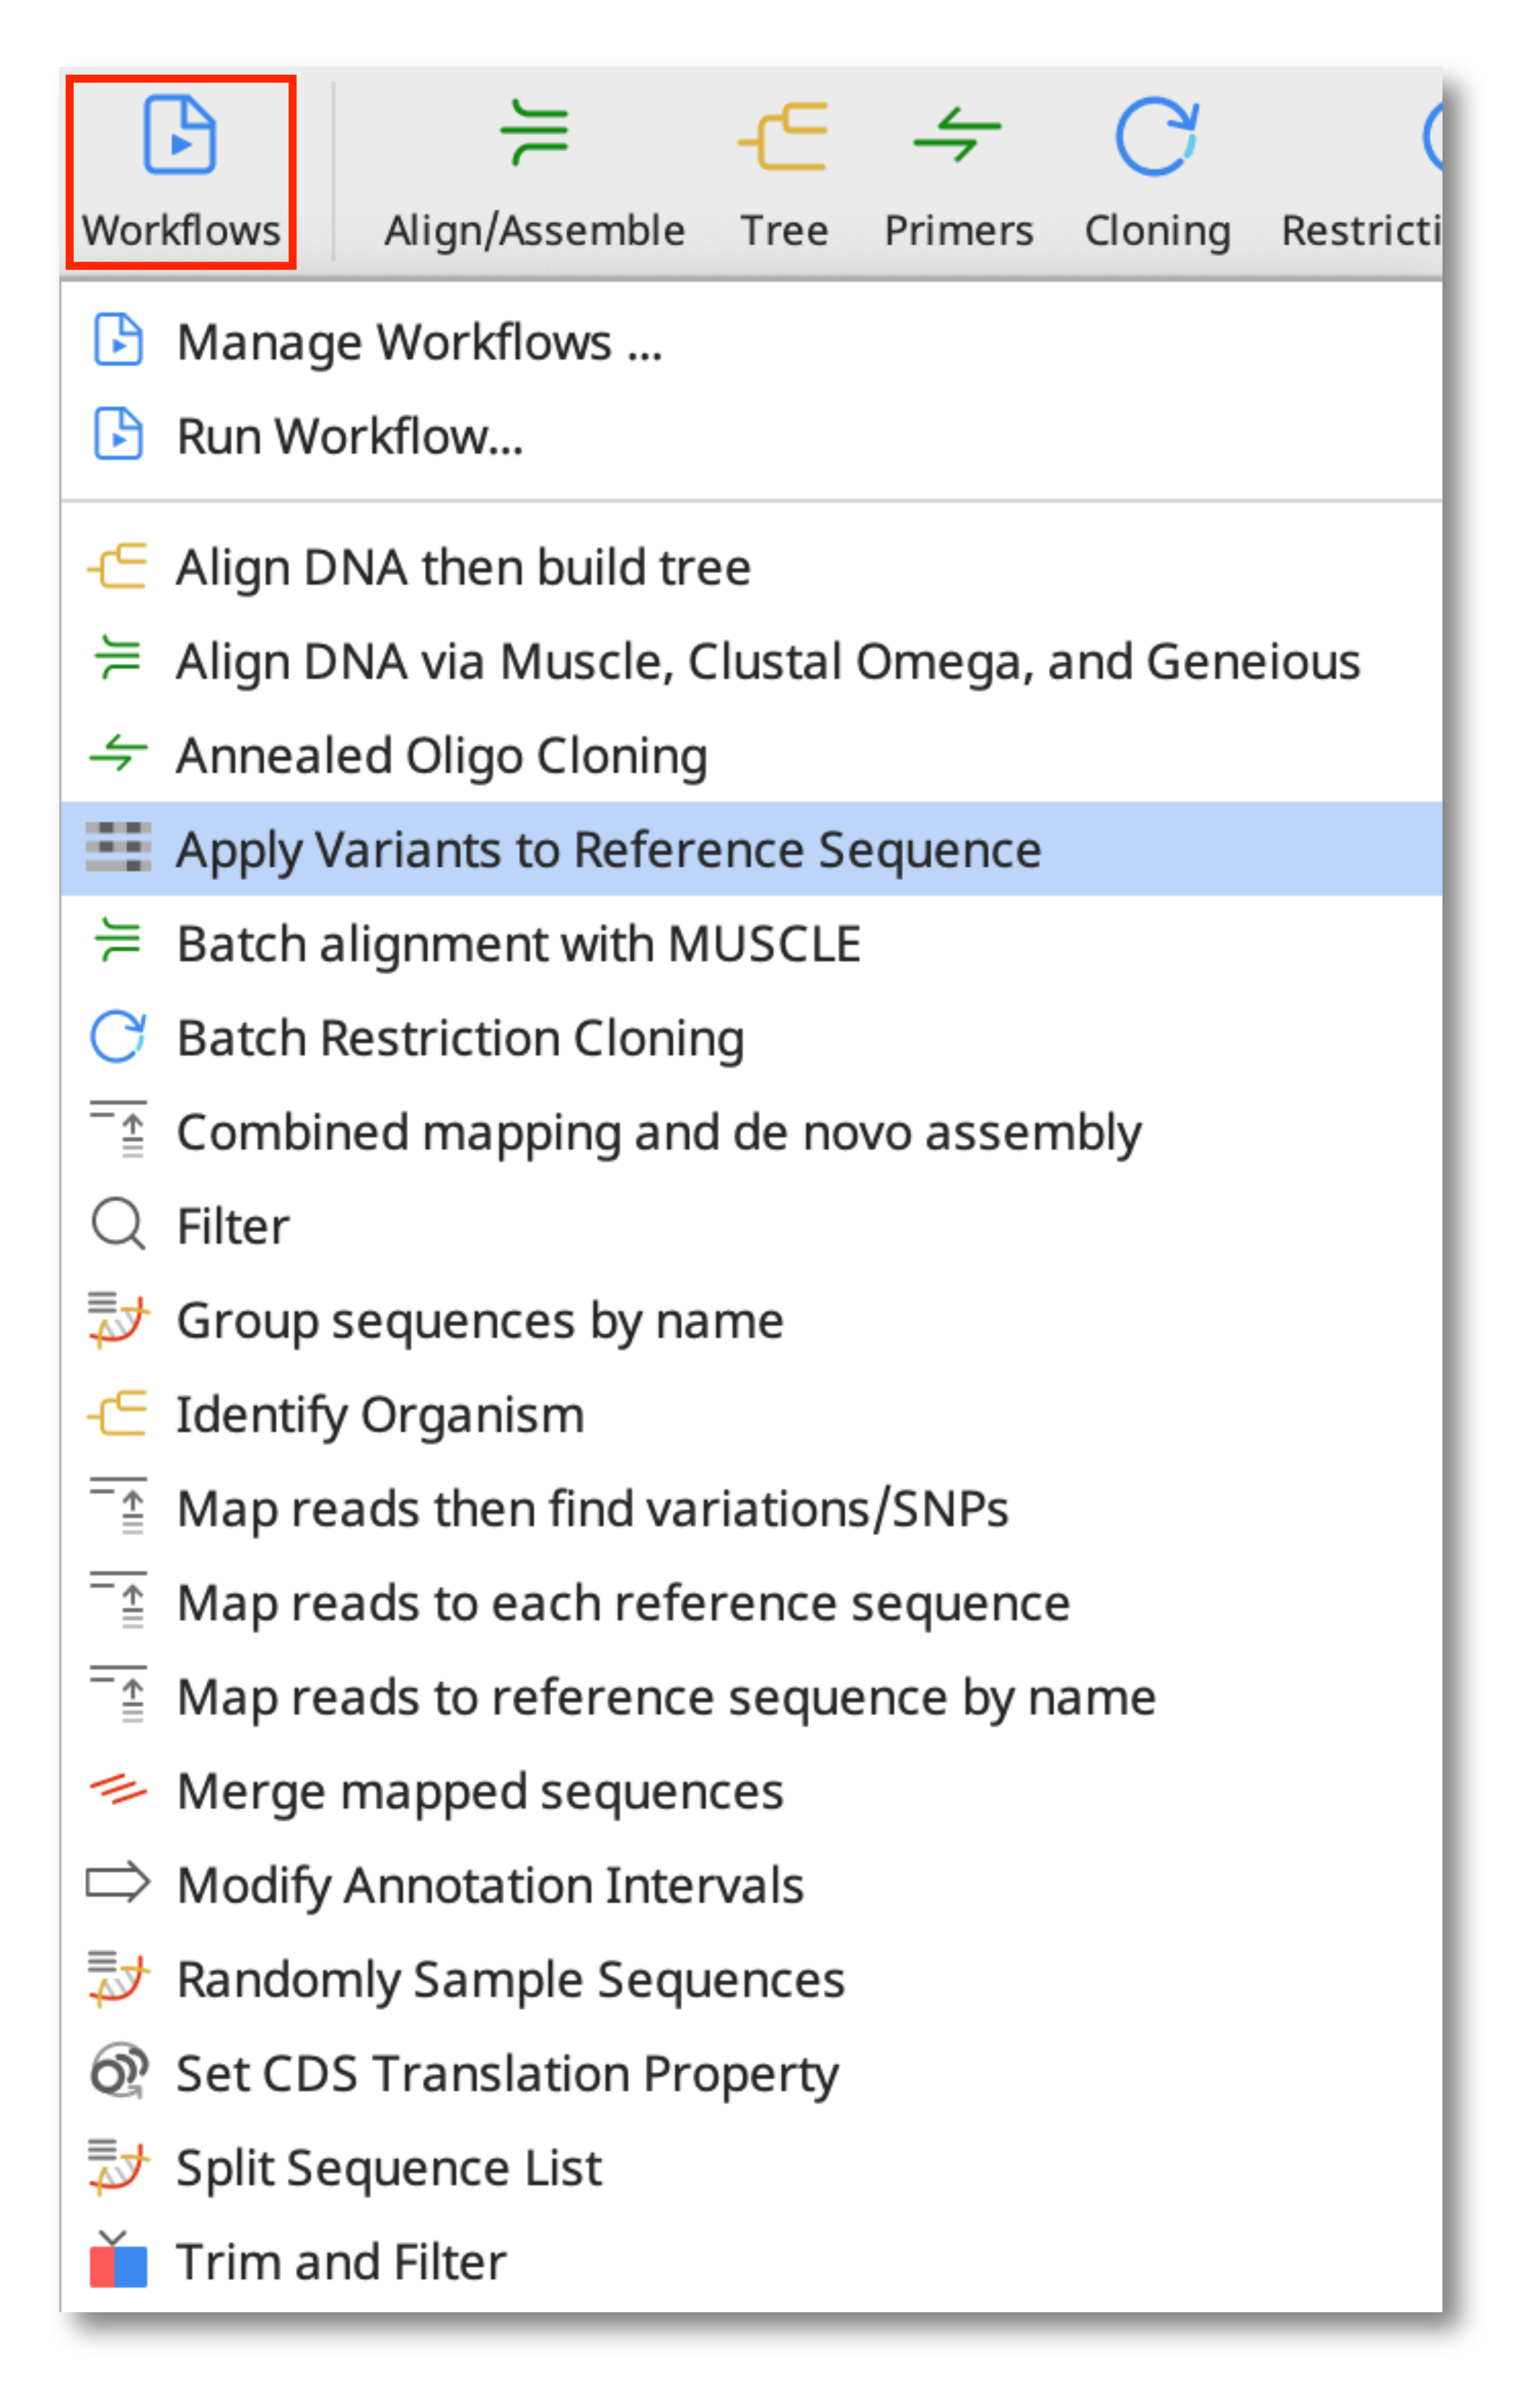
After the SNP calling has been completed, save the results. You now need to run the workflow Apply Variants to Reference to generate a new consensus sequence containing the variant bases.
(Prime 2022.2 onwards) To produce a consensus sequence where low coverage sites are masked with Ns, run the tool Find High/Low Coverage under the Annotate and Predict menu on your Contig document before running the Apply Variants to Reference workflow. Turn on the Low Coverage finder and set number of sequences to 10.
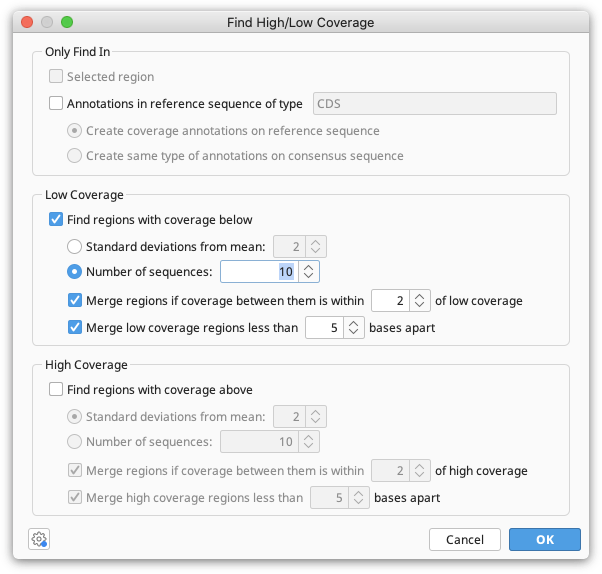
This will produce an annotation track denoting where the low coverage regions are, which can be used with the Apply Variants to Reference workflow.
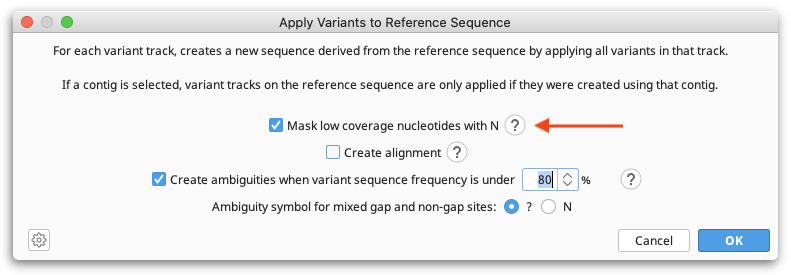
In the consensus sequence that is generated by the workflow, variants identified using Find Variations/SNPs will be included, and sites where the coverage is less than 10 will be masked with an N.
Further Reading
Artic network quick guide to tiling amplicon sequencing and downstream bioinformatics analysis
CDC SARS-Cov-2 sequencing resources
Automated Workflow for Geneious Prime 2022.2 and above
The analysis pipeline described here has been combined into a Geneious Workflow, attached below.
To import the workflow into Geneious, drag and drop it onto the Geneious window. Then go to Manage Workflows, select the workflow and go View/Edit. Open each step of the workflow by clicking on the step and going View/Edit options. This will update the options for your copy of Geneious and enable you to select the primers and reference sequence from your own database.
To run the workflow, close the Manage Workflows window and select the files of raw Illumina reads you wish to assemble. Then click the Workflows button and select the workflow from the list.